Restoring a Classic: Bringing a 1980s Arcade Cabinet Back to Life
Arcade restoration is both an art and a science, requiring patience, skill, and dedication. Our recent Galaga restoration project illustrates the typical challenges and rewards of bringing a classic cabinet back to life.
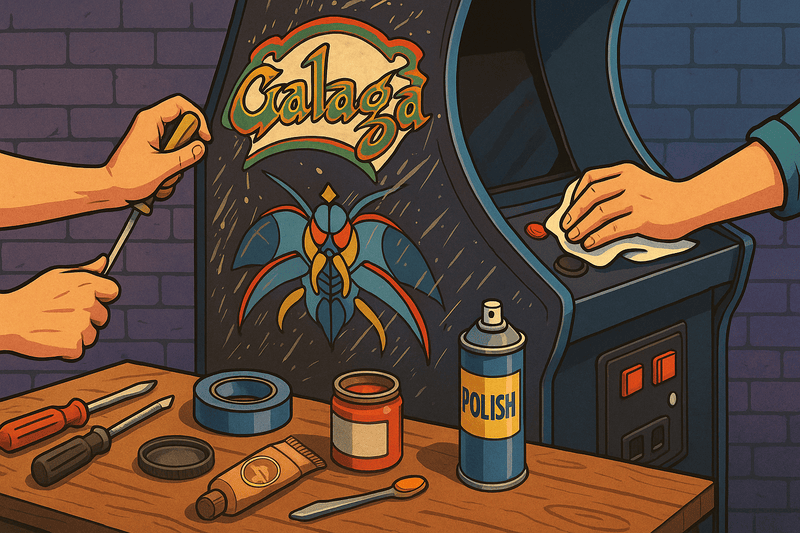
Project Overview: 1981 Galaga Cabinet
When we acquired this Galaga cabinet, it had spent decades in a basement, showing the wear and tear of both heavy use and neglect. This restoration would test every aspect of our arcade repair skills.
Initial Assessment
The assessment phase revealed typical issues: faded side art, a failing monitor, sticky controls, and a cabinet that had seen better days. The good news was that the PCB (printed circuit board) was still functional, which is often the most challenging component to repair or replace.
Condition Summary:
- Cabinet: Structurally sound but cosmetically poor
- Monitor: Geometry issues, dim display, likely cap problems
- Controls: Sticky joystick, worn button contacts
- Electronics: PCB functional, power supply questionable
- Artwork: Severe fading and damage to side art
- T-molding: Missing or damaged throughout
Phase 1: Documentation and Disassembly
Cabinet restoration began with careful disassembly and documentation. We photographed every connection and component location to ensure proper reassembly. This step cannot be overstated in importance - many restoration projects fail during reassembly due to poor documentation.
Documentation Process
- Photo inventory of all components and connections
- Wiring diagrams marked with component locations
- Settings documentation for monitor adjustments
- Parts list with original part numbers when available
- Condition assessment with repair priority ranking
Safe Disassembly
- Discharge monitor safely before removing
- Bag and label all hardware by location
- Protect artwork during component removal
- Store PCBs in anti-static containers
- Inventory all removed components
Phase 2: Cabinet Restoration
Structural Assessment
The cabinet structure was solid, with only minor water damage near the base. We reinforced weak joints with wood glue and replaced damaged sections with matching materials.
Surface Preparation
The cabinet was stripped, sanded, and repainted using period-appropriate colors. This process took several weeks, as proper preparation is crucial for a lasting finish.
Steps Taken:
- Strip old paint with chemical strippers
- Sand surfaces progressing through grits 120-400
- Fill imperfections with wood filler
- Prime with high-quality primer
- Apply base coat in original color
- Wet sand between coats for smoothness
- Apply final clear coat for protection
Artwork Replacement
New side art was sourced from a reputable reproduction specialist. While not original, high-quality reproductions can look spectacular and are often more durable than surviving originals.
Phase 3: Monitor Restoration
The monitor required a complete rebuild, including new capacitors and adjustment of the display geometry. This is often the most technical and expensive part of restoration.
Monitor Chassis Rebuild
Safety Warning: Monitor restoration involves high voltages that can be lethal. Always discharge tubes safely and consider professional service for this component.
Restoration Steps:
- Capacitor replacement - all electrolytic caps replaced
- Resistor checking - test all high-value resistors
- Transistor testing - check output transistors
- Flyback transformer - test and replace if needed
- Tube testing - check cathode emission and focus
Geometry and Color Adjustment
With the electronics restored, we spent considerable time adjusting:
- Horizontal and vertical size
- Linearity corrections
- Corner pincushion
- Color purity and convergence
- Brightness and contrast optimization
Phase 4: Control System Overhaul
We also replaced worn buttons and joysticks with high-quality reproductions that maintain the original feel while offering improved durability.
Joystick Restoration
- Disassemble completely and clean all components
- Replace microswitches with quality Cherry or Zippy switches
- Lubricate shaft with appropriate bearing grease
- Adjust gate for proper 8-way operation
- Test responsiveness in all directions
Button Replacement
- Source period-correct colors and styles
- Install quality microswitches for crisp response
- Ensure proper button height and feel
- Test all button functions thoroughly
Phase 5: Electronics and Wiring
Power Supply Service
The original linear power supply needed attention:
- Replace filter capacitors
- Test output voltages under load
- Check regulation and ripple
- Verify proper grounding
- Install new fuses of correct ratings
Wiring Harness Inspection
- Check for brittle insulation
- Test continuity on all connections
- Replace questionable connectors
- Organize wiring for serviceability
- Label circuits for future maintenance
PCB Maintenance
Even though functional, the game PCB received attention:
- Clean edge connectors with contact cleaner
- Check socketed ICs for proper seating
- Test ROM checksums for data integrity
- Clean PCB surfaces of dust and corrosion
Phase 6: Final Assembly and Testing
Systematic Reassembly
Using our documentation, reassembly proceeded systematically:
- Install electronics in proper order
- Route wiring cleanly and securely
- Test each subsystem before closing cabinet
- Verify all connections multiple times
- Perform complete operational test
Quality Control Testing
- Play test all game functions
- Verify coin door operation
- Test service mode and adjustments
- Check attract mode operation
- Document final settings for future reference
Challenges and Solutions
Common Restoration Issues
Monitor Problems:
- Dim or flickering display: Usually capacitor-related
- Geometry distortion: Requires careful adjustment
- Color issues: Often yoke or convergence problems
Control Issues:
- Sticky joysticks: Cleaning and lubrication usually helps
- Unresponsive buttons: Switch replacement typically needed
- Intermittent problems: Usually connection-related
Cabinet Damage:
- Water damage: May require wood replacement
- Structural weakness: Reinforce with appropriate materials
- Missing hardware: Source period-correct replacements
Cost Analysis
Restoration Budget Breakdown
- Cabinet work (materials, paint, art): $300-500
- Monitor restoration: $200-400
- Control replacement: $100-200
- Electronics service: $100-300
- Miscellaneous parts: $100-200
- Professional services: $500-1000 (if needed)
Total Project Cost: $1,300-2,600
Time Investment
- Planning and documentation: 10-15 hours
- Cabinet restoration: 40-60 hours
- Monitor service: 15-25 hours
- Electronics work: 10-20 hours
- Final assembly and testing: 10-15 hours
Total Time: 85-135 hours
Results and Lessons Learned
Project Outcomes
The restored Galaga cabinet now operates like new, with vibrant colors, responsive controls, and reliable operation. The investment in time and materials has created a museum-quality piece that will provide decades of enjoyment.
Key Takeaways
- Documentation is crucial - photograph everything
- Quality parts matter - don't compromise on components
- Take your time - rushing leads to mistakes
- Safety first - especially with monitor work
- Test frequently - catch problems early
Was It Worth It?
Absolutely. The satisfaction of bringing a piece of gaming history back to life is immeasurable. Plus, a properly restored Galaga cabinet has significant value - both monetary and sentimental.
Resources for Your Restoration
Essential Tools
- Basic hand tools (screwdrivers, pliers, etc.)
- Multimeter for electrical testing
- Soldering equipment for electronics work
- Sanders and painting supplies
- Safety equipment (especially for monitor work)
Parts Sources
- Arcade specialty suppliers for controls and hardware
- Electronics distributors for capacitors and components
- Artwork reproduction services for side art and marquees
- Monitor specialists for CRT restoration services
Online Communities
- KLOV (Killer List of Videogames) forums
- Arcade-Museum.com for technical resources
- Reddit r/cade for project sharing
- Facebook arcade groups for parts and advice
Conclusion
Arcade restoration is challenging but incredibly rewarding. Each project teaches new skills and preserves gaming history. Whether you're restoring your first cabinet or your fiftieth, the process never gets old.
The key is to approach each restoration with respect for the original engineering while using modern knowledge and materials to improve reliability and longevity.
Every restored arcade cabinet is a piece of gaming history saved for future generations. The skills you learn and the satisfaction you gain make every hour worthwhile.